Purpose:
To create Purchase Orders on different vendors
against a specific scheme.
The HO Raises
Purchase Orders for the following: PO TYPE
1. HO-Schemes (HO-PO)
2. Depot Schemes
(DEPOT-PO)
The vendor can deliver the items by 3 ways:
1. Gift items
despatched by the vendor to the designated
third party shippers like Mazmonet (NIiadhri Associates).
2. Gift items directly delivered by the vendor
to the respective depot as per the PO annexure.
3. Gift items directly delivered by the vendor
to a regional depot (Consolidated Despatch) for
further despatch to other depots in that region
as per the annexure.
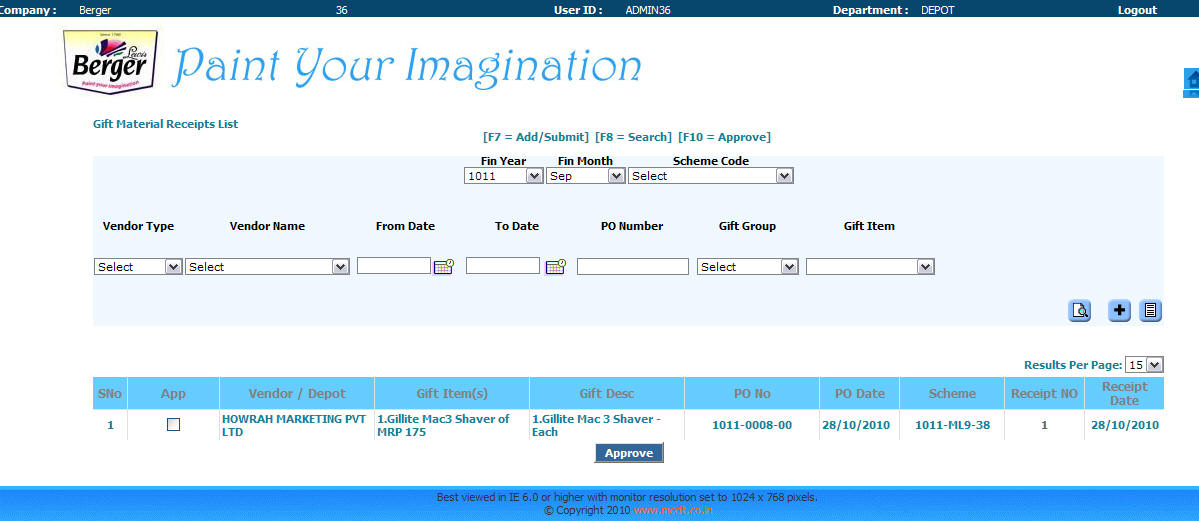
All previously created PO's will be listed in
the screen when you click on Purchase Order
option as shown below: If you want to look at
the details in a particular PO or print the PO
again, click on the hyper link on PO
.
PLEASE ENSURE THAT ALL ENTRIES MADE IN THE
SYSTEM ARE CHECKED AND APPROVED. select the
check box against all unapproved POs and and
click on APPROVE Button at the bootom of the
screen or press function key F10.
All the PO's created before this
operation will be listed as shown below. If you
want to now create a new PO of gift items
against a vendor,
click the
button. This will display a screen where the
details have to be entered. After the entry is
created the depot has to approve this entry by
selecting the check box first display filed in the
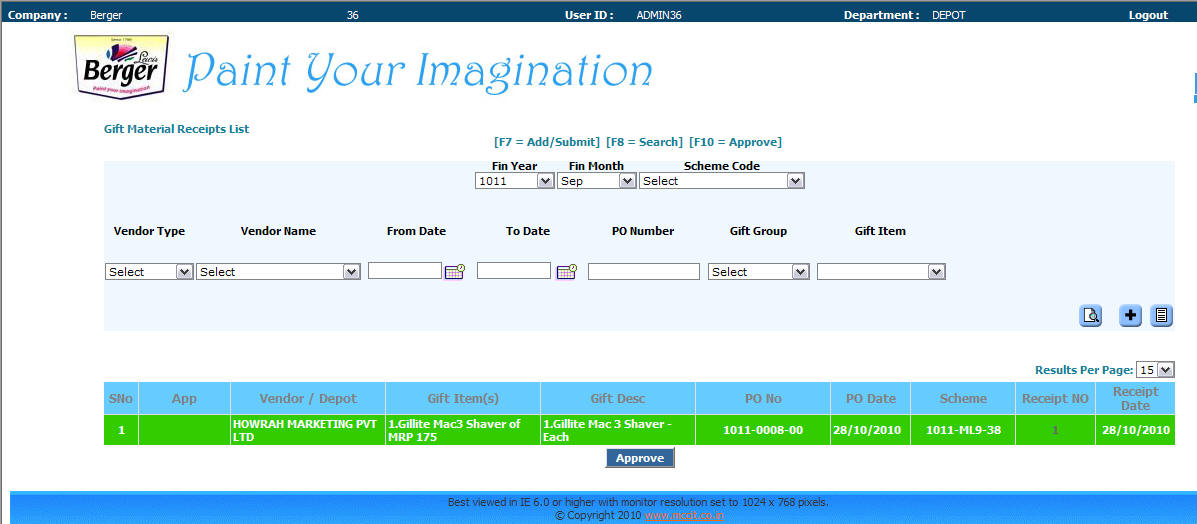
list screen and approve the transaction. Once it
is approved the color of display of this entry
will change to green. So if you find any entry
that is not displayed in green color means that
you have not approved the entry. Unless the
approval is made the gift stock status
quantities will not be updated by the entry made in the system.
After the approval is
done, the display will look like this as shown
below:
When you click
button the entry screen will be displayed.
The following fields
are to be entered:
1. Select PO type dropdown. Select HO-PO for all
HO schemes. Select DEPOT-PO for all depot schems.
2. Vendor type will show 'Vendor By default.
select the next dropdown where all the PO
vendors created in the vendor master will be
displayed. Select the vendor against whom the PO
is to be raised. If you find the vendor name is
not in the dropdown, then click on Home
on top right corner of the screen. Select the
vendor Master option from the menu or quick link
in the homepage. Create the vendor details and
get back to PO option from menu.
3. Once the vendor is selected the name address
of the vendor will be displayed for you check
that you have selected the right vendor.
4. Next against the Scheme code heading, the
current financial year is displayed. Select the
business line e.g. ML1 or ML2 or D01 from the
dropdown list. Enter the scheme number and press
tab. If the selected scheme code is present in
the scheme master, it will display the scheme
description else will display
5. Next enter the delivery dates i.e the date
range by which the supply has to be made. e.g.
delivery 02/11/2010 - 12/11/2010.
6. Select from dropdown Delivery location as
Niladhri if material is to be despatched to the
third party shipper. Select Direct if is to be
despatched to depots dirctly.
7. Next ot Payment dropdown, type the payment
terms as shown in the example.
8. Select Payment Terms as Credit or Cash as the
case may be.
9. Enter the payment days in number in the
filed.
10. Type Delivery
despatch schedule as shown in the example as
relevant.
11. The gift item relevant to the schemes will
be loaded in the system. Now you have to select
the gift type and gift item from dropdown and
press tab. If the redemption are loaded in the
system, it will show the balance quantity to be
ordered. The quantity can also be -ve incase you
had earlier raised a PO with a higher quantity
than what is needed.
12. Enter vendor item code if required.
13. check the quantity
and modify as necessary
14. check the MRP & PO
price if they are correct else update the same
press tab. Check the Amount.
15. After selecting all
the gift items to be ordered against the vendor
click the submit button or function key F7 to
create the PO.
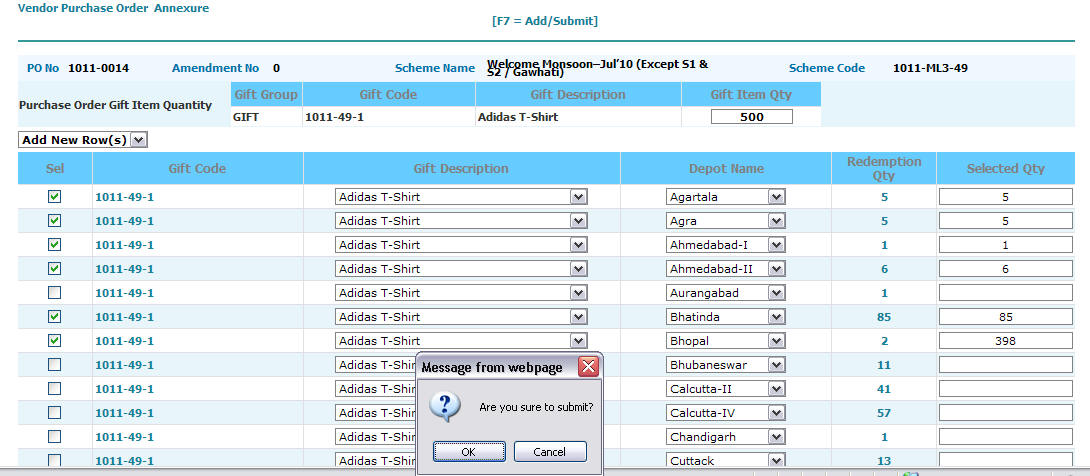
16. If the PO delivery
location is direct the annexure will be
displayed after submitting the form as shown
below. select the depots by checkbox and enter /
modify the selected qty and submit. (PLEASE NOTE
THAT THE SELECTED QUANTITY MUST BE EQUAL TO THE
PURCHASE ORDER QUANTITY) AGAINST THE SELECTED
ITEMS).
17. The PO has to be
approved after creation. select the checkbox in
the list screen and click on the approve button
or F10.
18. Click on the po
number hyperlink and click on the print button
to print the PO.
.
19. Save the PO as PDF
file and upload the same against the scheme from
scheme master option.

 .
.